
Local pollinators
How to Keep and Manage Mason Bees: A Simple, Local Approach
Nesting tubes, a sheltered morning-sun spot, a mud source and an autumn clean-up: everything a gardener or family needs to host mason bees well.
Mark Vanderende · October 29, 2026
START WITH LOCAL BEES
The best mason bees for your garden are the ones already living near you. If you buy cocoons, choose a nearby local source and avoid moving bees long distances; bees shipped between regions can carry pests and diseases and may not match your local bloom. Many gardeners simply put out a good nest and let wild mason bees find it.
CHOOSE A GOOD NEST
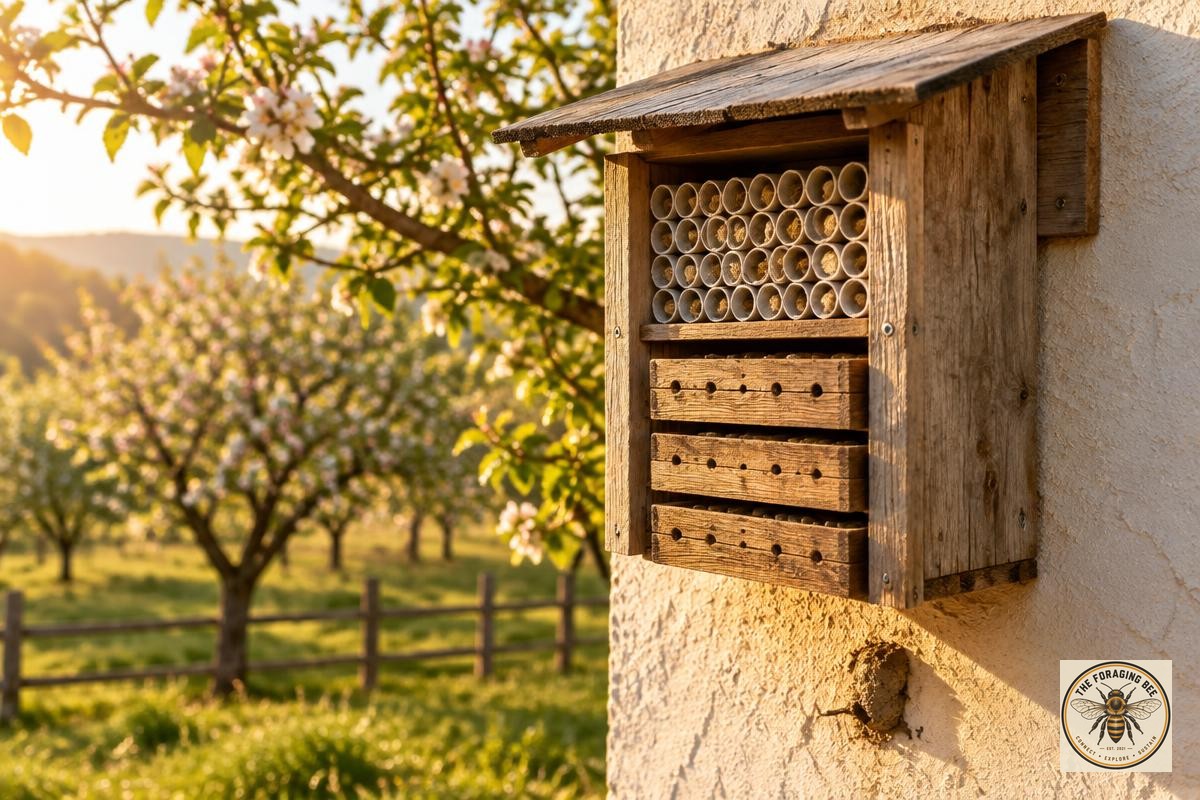
Use nesting holes about 8 mm (5/16 inch) wide and roughly 15 cm (6 inches) deep. Good options are paper tube liners inside a block, natural reeds, or wooden trays that open for cleaning. Avoid cheap bee hotels with shallow holes, bamboo you cannot open, or tubes that cannot be cleaned or replaced—these can build up pests year after year.
A modest nest is better than a giant one. A few dozen holes that you can manage well beats hundreds that become a disease trap.
PLACE IT WELL
Mount the nest firmly at roughly eye height on a wall, fence or shed, facing morning sun (south-east is ideal), with a roof that keeps off rain. It should not sway in the wind. Put it out in early spring before the first fruit or willow bloom.
PROVIDE MUD AND BLOOM
Mason bees need moist clay-rich mud within a short flight of the nest. A small patch of bare soil kept damp—or a shallow tray of clay mud—works. Plant or protect early spring bloom close by: fruit trees, willow, Oregon grape, currants and spring wildflowers. Avoid pesticide use on or near flowering plants the bees visit.
SUMMER: PROTECT THE FILLED TUBES
When nesting ends and tubes are capped with mud, protect the nest from birds and from tiny parasitic wasps that lay eggs through the tube walls. Many keepers move the filled tubes into a fine-mesh bag or a sheltered, unheated outbuilding for summer, kept dry and out of the sun.
AUTUMN: HARVEST AND CLEAN COCOONS
In autumn, once the bees are inside their cocoons, carefully open the tubes or trays. Remove cocoons, discard debris and look for problems: pollen mites (tiny orange specks), chalkbrood (hard, chalky cells) and parasitized or empty cocoons. Gently rinse healthy cocoons in cool water, let them dry and discard spoiled material. Replace paper liners every year and clean trays before reuse.
WINTER: KEEP THEM COLD AND DRY
Store clean cocoons somewhere cool, dark and steady—an unheated garage or a refrigerator with a little humidity, never freezing-wet and never warm. Warmth can trigger early emergence or exhaust stored energy.
SPRING: RELEASE
When local bloom begins, place cocoons in a small protected release box beside the nest. The bees emerge on their own as the days warm. Then the cycle begins again.
THE 4H WAY
Happy: gentle handling and nests that suit the bee. Healthy: annual cleaning and local sourcing. Heavy: abundant spring bloom close by. Harmony: mud, flowers, shelter and no pesticides—a landscape that welcomes every pollinator, not just the honey bee.
FIELD NOTE
Record how many tubes were filled, how many healthy cocoons you harvested and what problems you found. That record shows whether your nest and your garden are improving year to year.
Sources and boundaries
Practical handbook on Osmia lignaria biology, nesting, cocoon care and release.
Guidance on native bees, habitat and reducing pesticide harm.